

Ticket output has two layers
- A Print Template defines the immutable visual payload: paper width, block order, typography, logo, dates, ticket number, service, QR code, and footer.
- A Kiosk selects the Queue Unit, customer-facing Kiosk Template, service Categories, Print Template, and browser print behavior.
Create a Print Template
- Open the Queue Unit.
- Select Settings.
- Find Ticket output designs.
- Select Create template.
- Enter a template name.
- Select 58 mm or 80 mm paper.
- Optionally select Set as default for this Queue Unit.
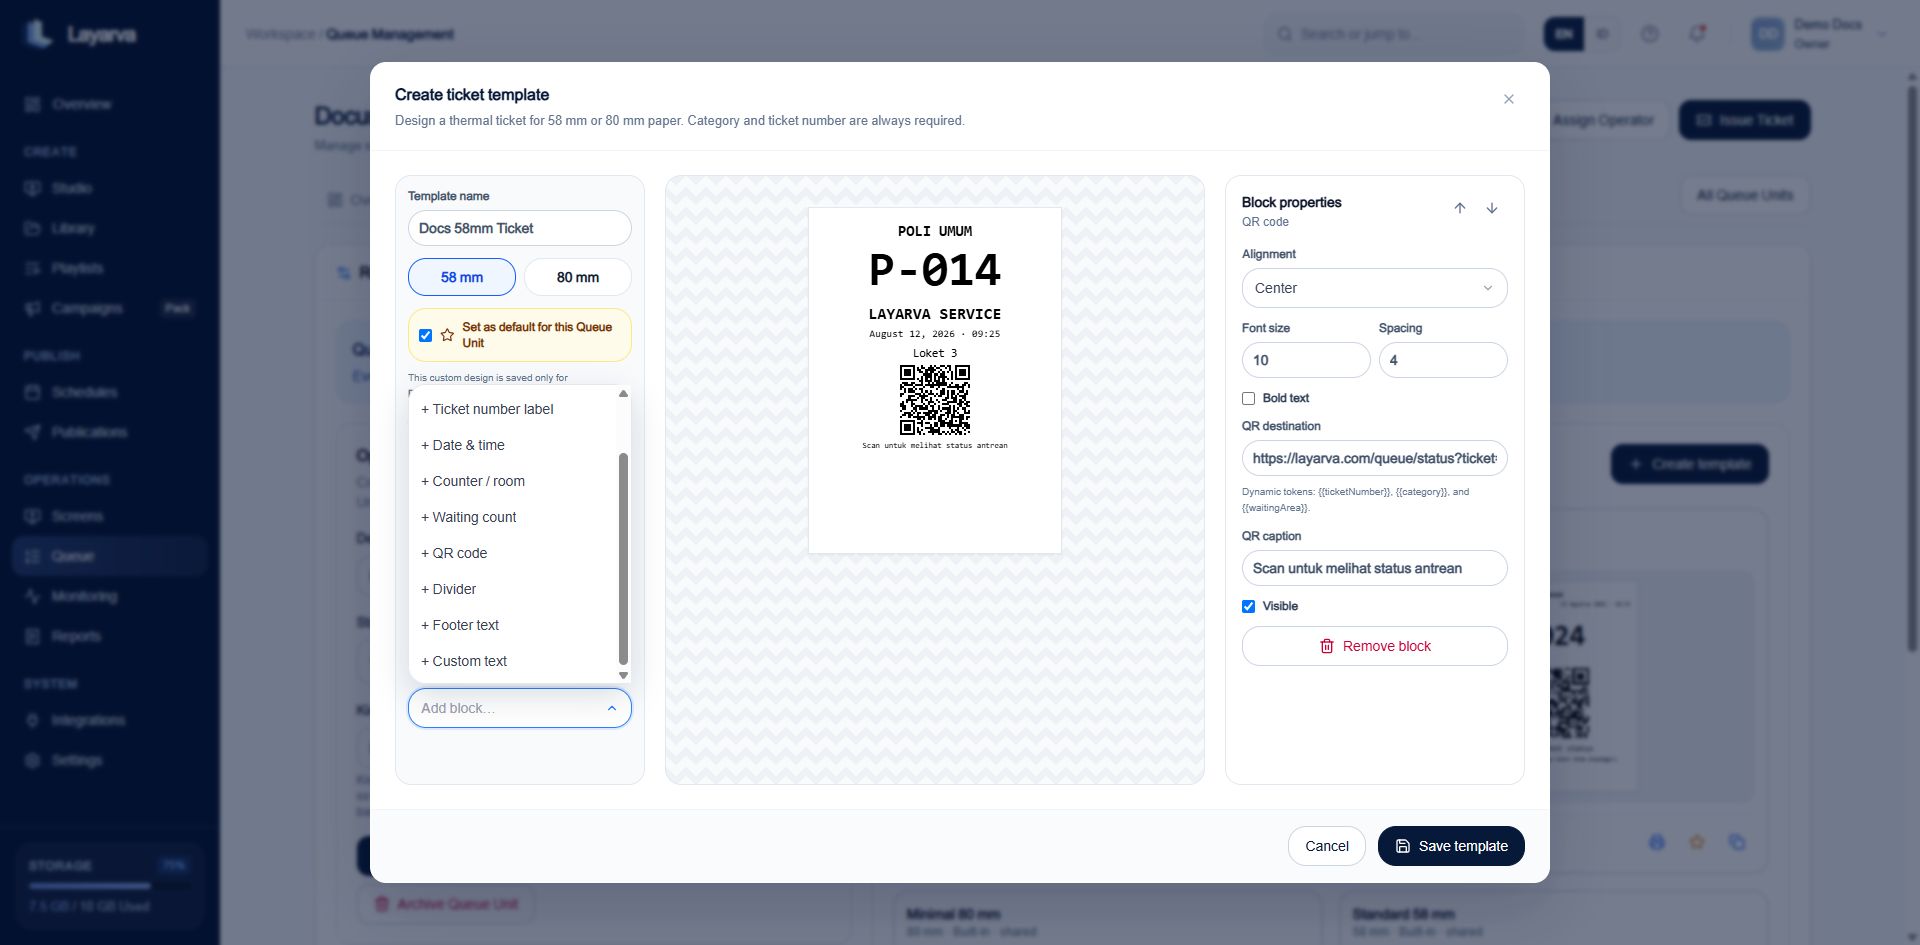
The ticket editor combines block ordering, a live thermal-paper preview, and properties for the selected block.
Build the ticket from blocks
The left column defines top-to-bottom order. Select a block to edit its properties and use the arrow controls to move it. Common blocks include:- Logo and company text.
- Header and custom text.
- Ticket label and ticket number.
- Service Category.
- Waiting area or waiting count.
- Issue date and time.
- Divider.
- QR code and caption.
- Footer.
{{ticketNumber}}, {{category}}, and {{waitingArea}}.
Logo requirements
- PNG, JPEG, or WebP.
- Maximum 300 KB.
- Ratio close to 1:1, 1.5:1, 2:1, or 1:1.5.
Choose and test the default
From Ticket output designs:- Select Set as this Queue Unit default so new Kiosk choices inherit it.
- Select Test print to open the browser’s print flow with sample ticket data.
- Select Duplicate template before creating a variation.
- Edit or archive custom templates. Existing print jobs retain their rendered historical payload.
Configure a Kiosk to print
- Open Kiosks and create or edit a Kiosk station.
- Select the Queue Unit and the customer-facing Kiosk Template.
- Choose which service Categories the Kiosk may issue.
- Select the Print Template.
- Enable and configure browser printing for the attached thermal printer.
- Save, review the Kiosk in Ready, and activate it.
- Issue one test ticket and verify the Kiosk activity and print-job evidence.