
What you’ll accomplish
You will configure a customer-facing ticket Kiosk, protect it with an unlock PIN, select its services and print template, and choose Cloud or Edge operation.Cloud and Edge Kiosks differ
Create a Cloud Kiosk
- Open the Queue Unit and select Kiosks.
- Select Add Kiosk.
- Enter the Kiosk name and Location.
- Choose whether to enable a four-to-six-digit unlock PIN.
- Select a customer-facing template, orientation, resolution, and background.
- Enable the service Categories customers can select.
- Choose the Print Template.
- Create the Kiosk.
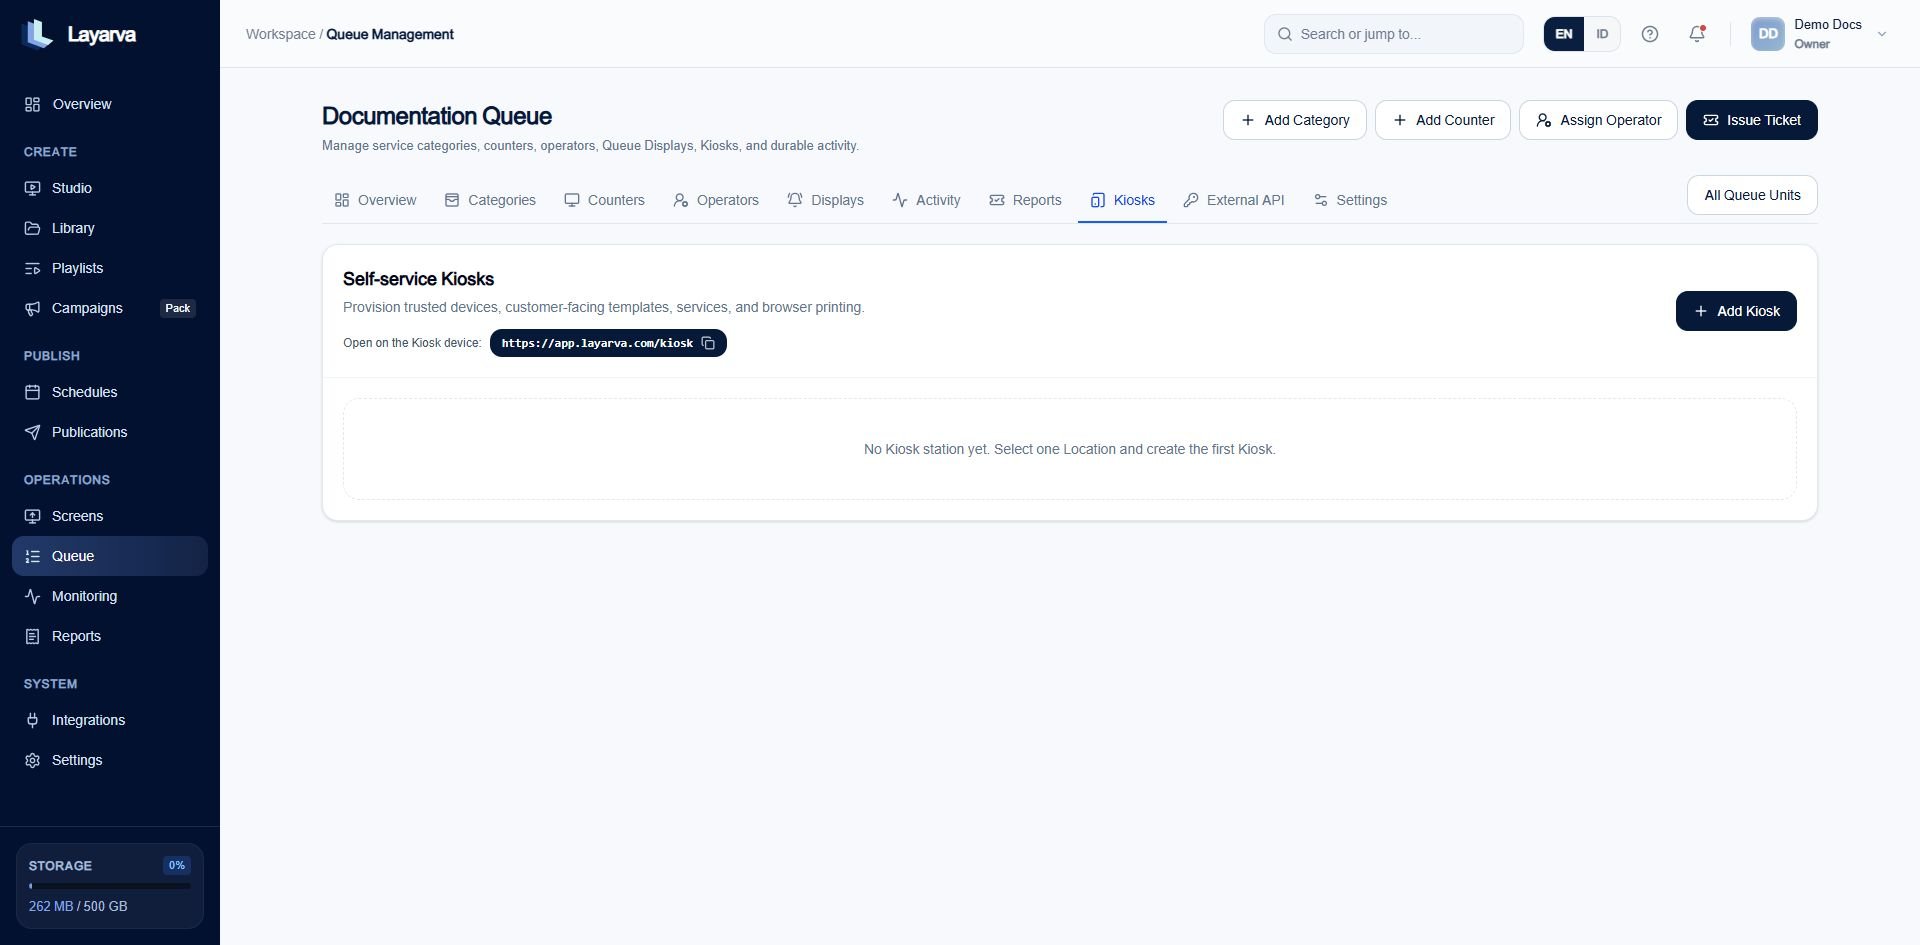
The Kiosks tab provides the customer device URL and manages trusted stations for the selected Queue Unit.
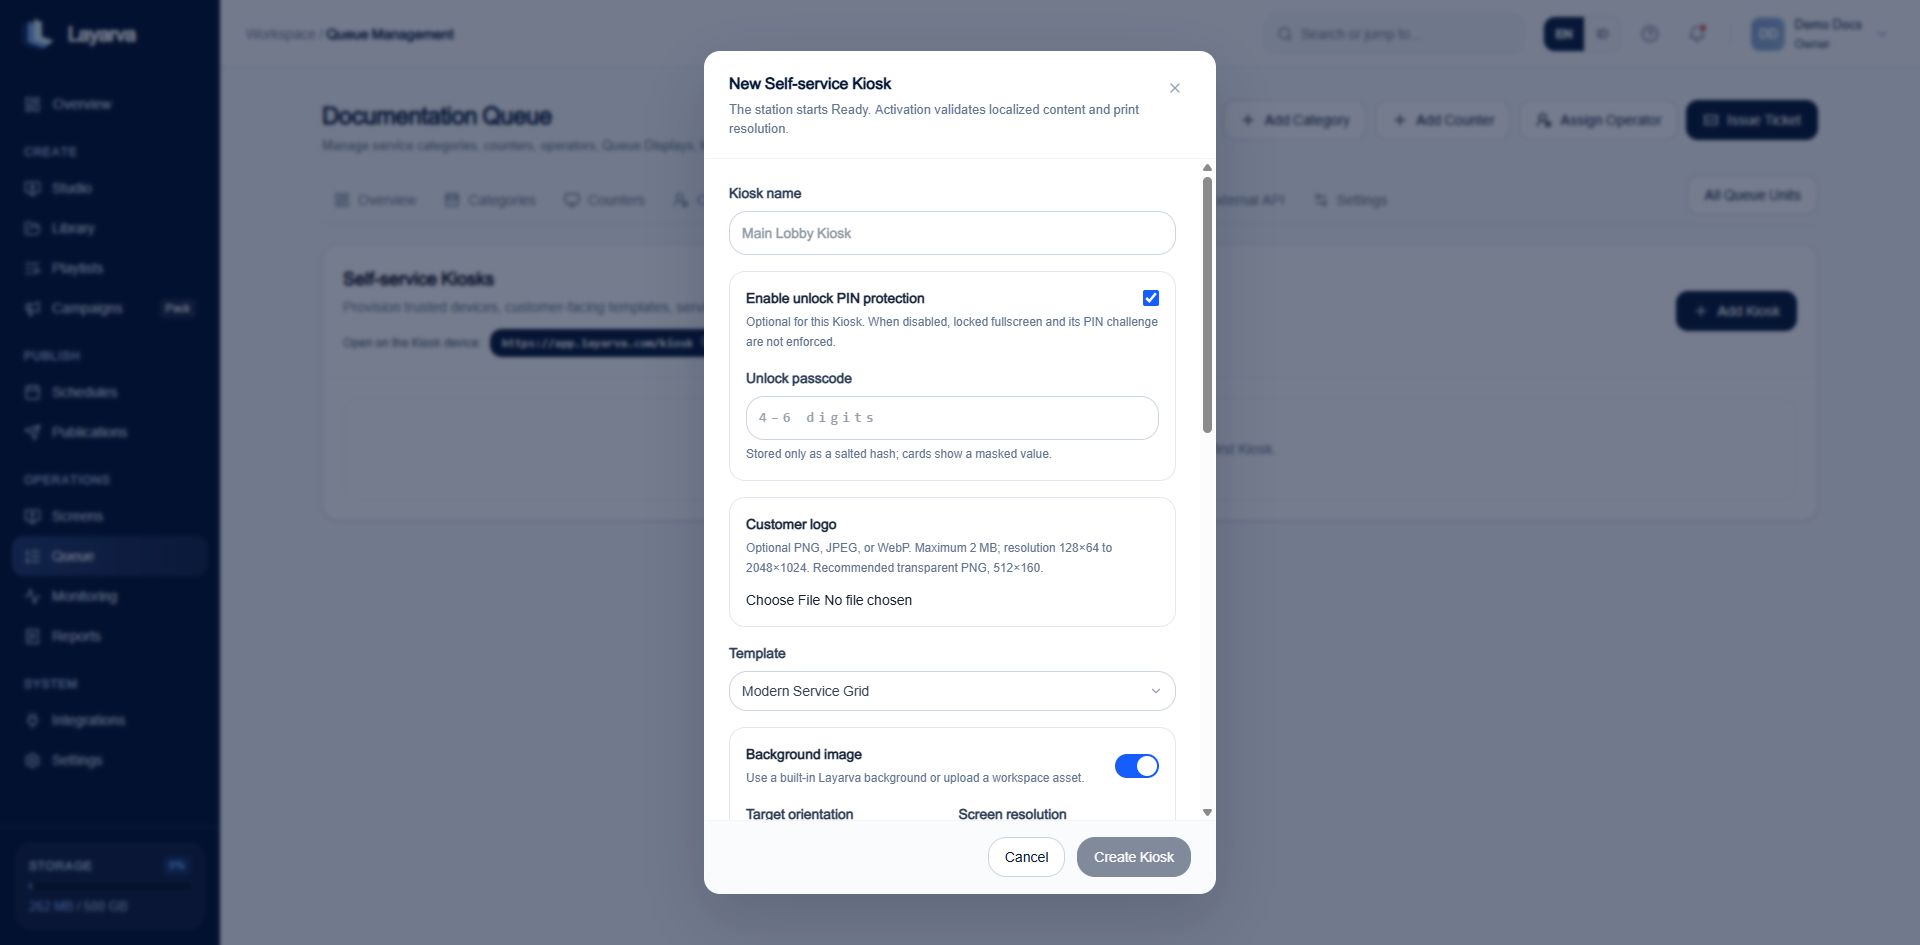
Kiosk configuration combines PIN protection, branding, screen layout, services, and the thermal Print Template.
Pair the Cloud Kiosk
Open https://app.layarva.com/kiosk on the Kiosk device. The first page prepares Windows for full-screen operation and silent thermal printing; it does not immediately show a pairing code.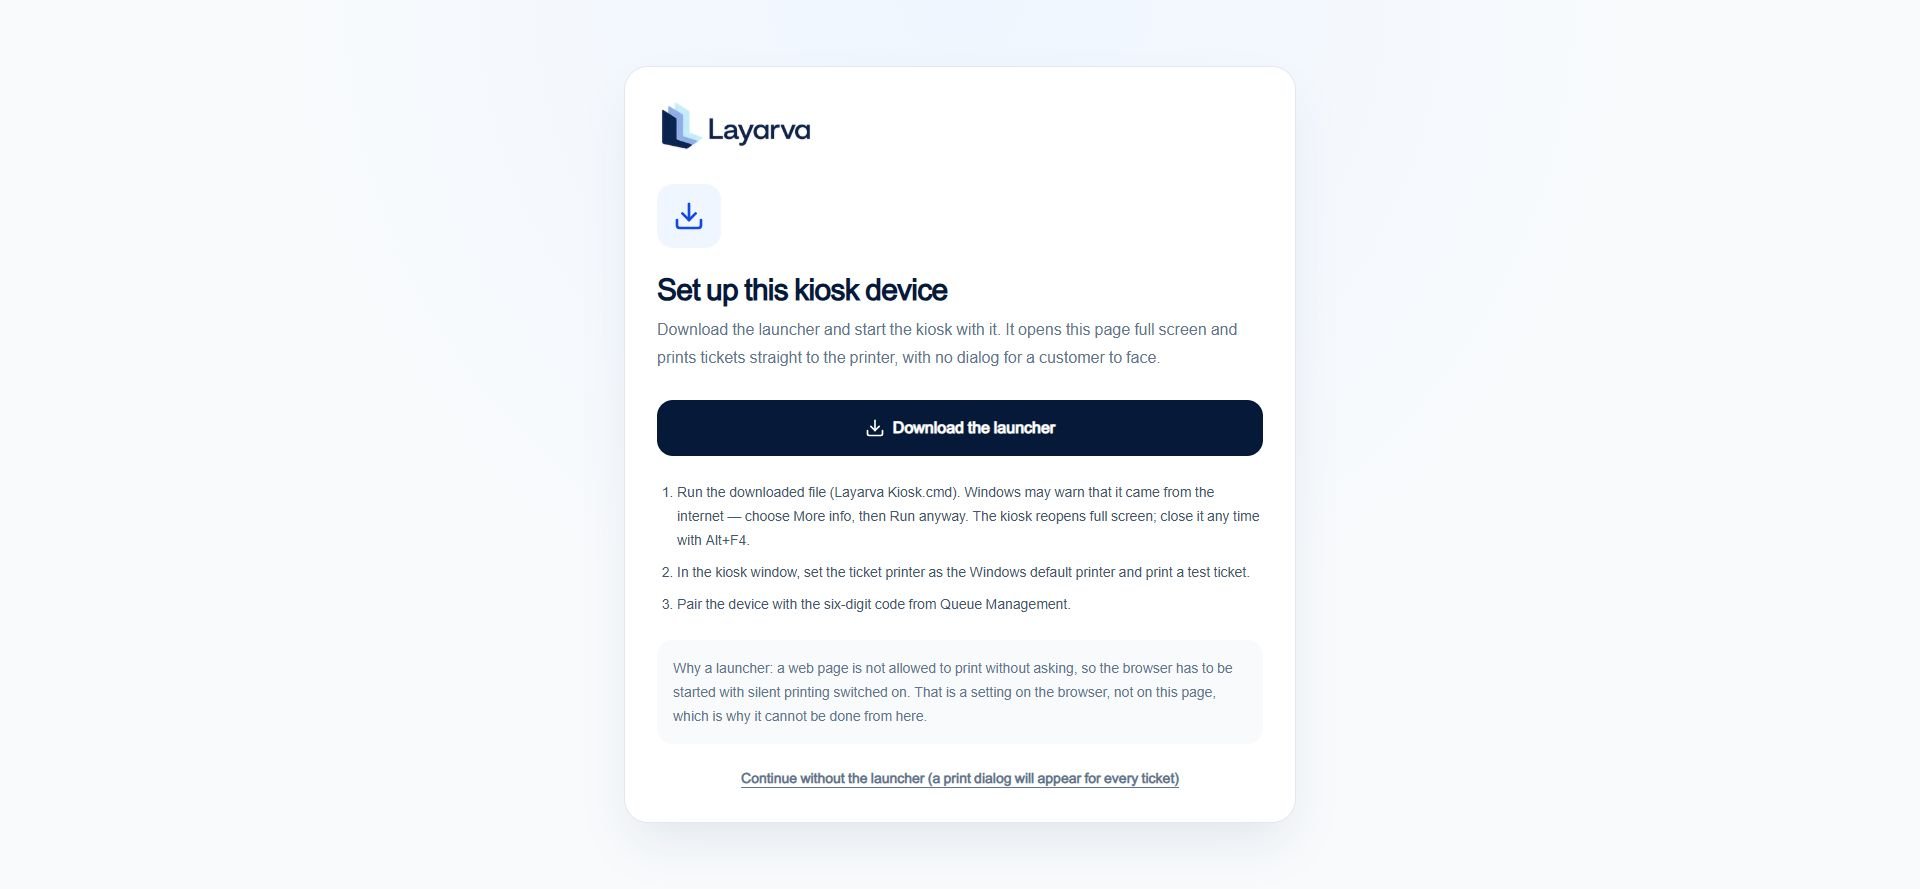
The Kiosk page offers the Windows launcher before pairing because a normal web page cannot enable silent printing by itself.
Recommended Windows launcher workflow
- Select Download the launcher.
- Run
Layarva Kiosk.cmd. If Windows warns that the file came from the internet, review the source and use More info → Run anyway only for the file downloaded directly from Layarva. - In the full-screen Kiosk window, set the thermal printer as the Windows default printer.
- Print a physical test ticket and verify paper width, cutting, logo, QR, and footer.
- Continue to pairing and enter the six-digit code from Queue Management.
- Verify that the secure Kiosk session is created and the station becomes Ready.
Alt+F4 when maintenance is required.
Browser-only fallback
Select Continue without the launcher when silent printing is not required or the device is not using the Windows launcher. The Kiosk remains usable, but a browser print dialog appears for every ticket. The session is stored in an HTTP-only, Secure, SameSite-Strict cookie. Unlock identity comes from that session, not from a Kiosk ID supplied by the browser.Unlock protection
A Kiosk unlock PIN is four to six numeric digits. Attempts are limited to five per five minutes per Kiosk token. A Kiosk without an active paired session cannot use the unlock endpoint.Printing
- A Cloud Kiosk uses the browser print path and records print-job evidence.
- Silent Cloud printing requires the Windows launcher or an equivalently managed browser kiosk policy.
- An Edge Kiosk can use the installed Edge application’s printer integration.
- The selected Print Template determines paper width, block layout, logo, QR, and footer.
- Always perform a physical test on the target printer before opening the Kiosk to customers.