> ## Documentation Index
> Fetch the complete documentation index at: https://docs.layarva.com/llms.txt
> Use this file to discover all available pages before exploring further.
# Configure the Queue External API
> Create a scoped Queue credential, configure outbound webhooks, and understand the operational boundary.
## What you'll accomplish
You will create an integration credential limited to one Queue Unit and selected services, then configure signed webhook delivery.
## Prerequisites
* `queue.manage` permission.
* A configured Queue Unit with at least one Category.
* A server-side integration client. Never place the credential in public browser code.
## Create a Queue credential
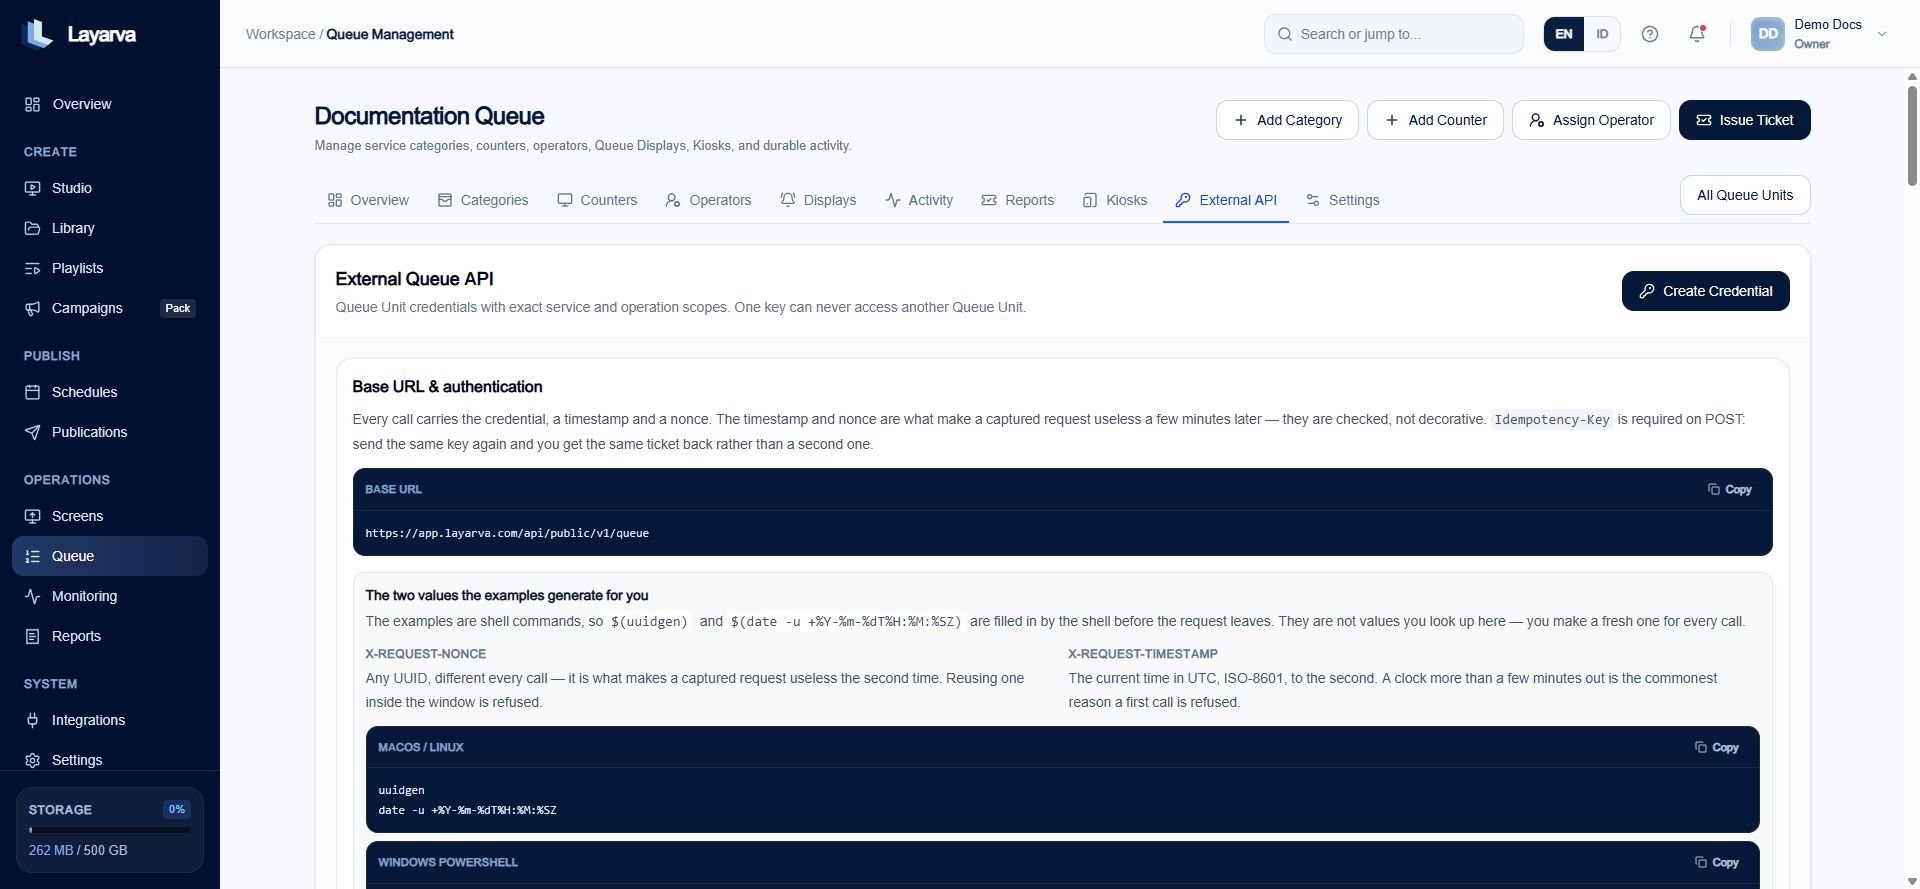
1. Open the Queue Unit and select **External API**.
2. Select **Create Credential**.
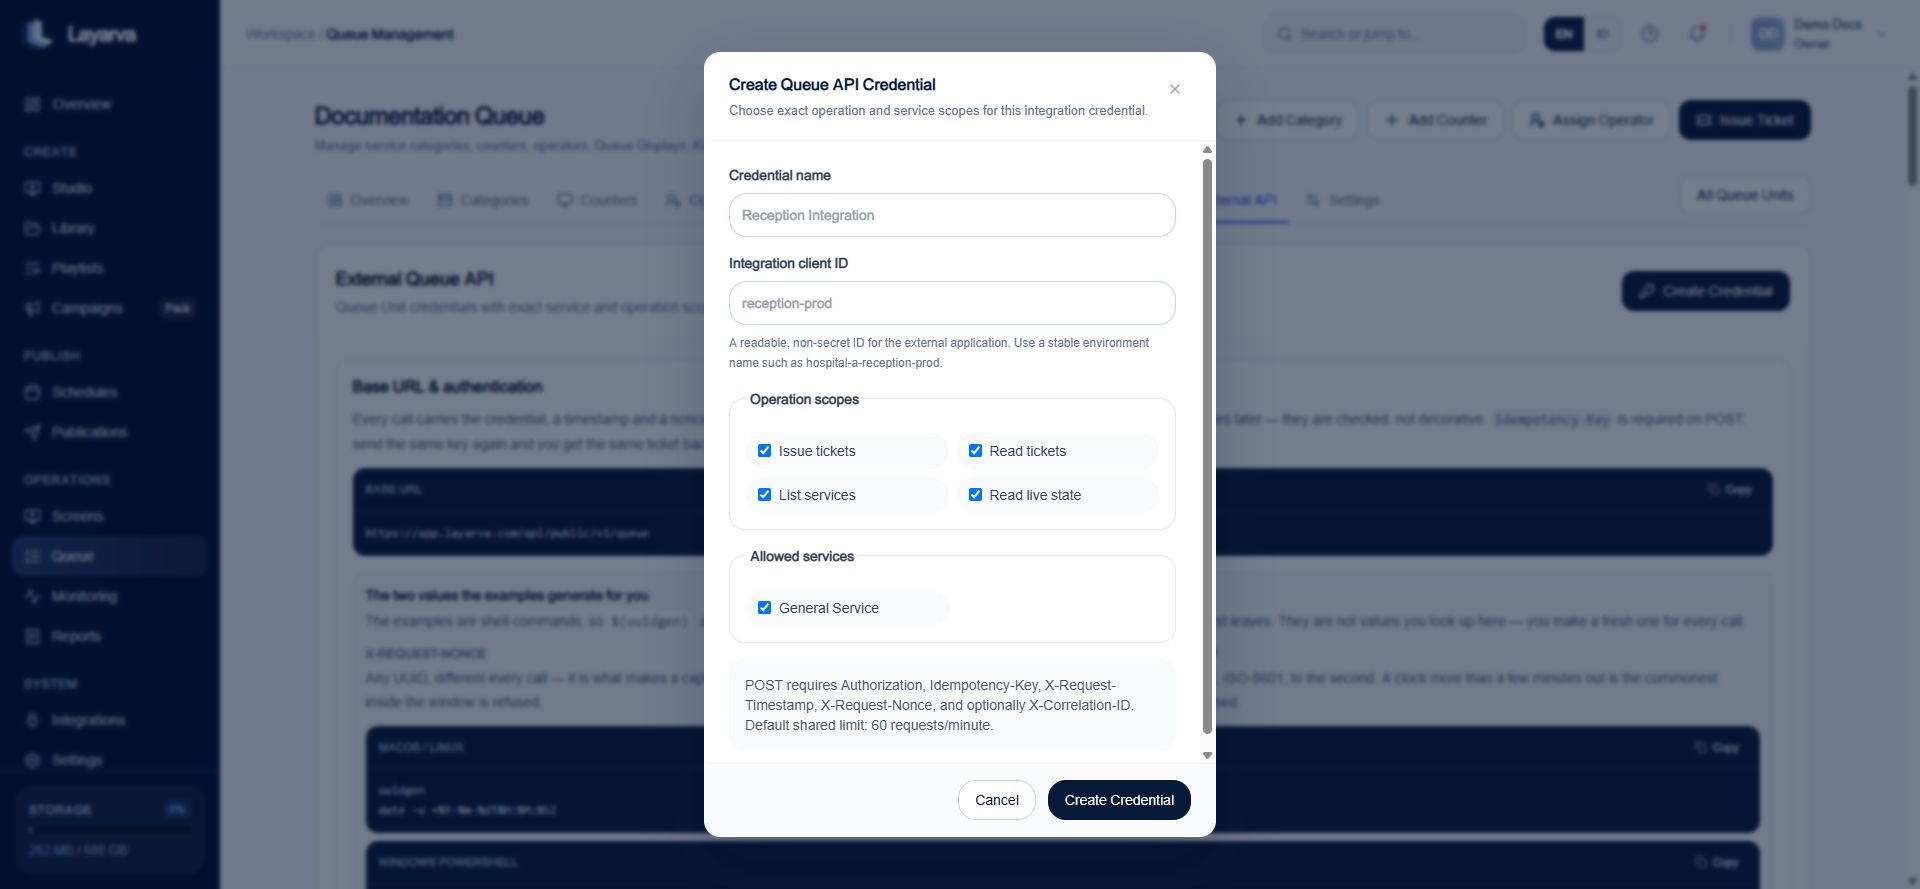
3. Enter a readable credential name and stable client ID.
4. Select the operation scopes: issue tickets, read tickets, list services, or read live state.
5. Select the exact service Categories the integration may access.
6. Create the credential and copy the secret once into a secure server-side secret store.
 ## Request security
Every request uses:
* `Authorization: Bearer `
* Optional `X-Correlation-ID` for tracing.
`POST /tickets` additionally uses:
* `X-Request-Timestamp` containing current UTC ISO-8601 time.
* A unique `X-Request-Nonce`.
* `Idempotency-Key`.
Timestamp freshness is five minutes, nonce replay records live for ten minutes, and the shared default limit is 60 requests per minute per credential.
## Configure a webhook endpoint
1. Select **Add endpoint**.
2. Enter a name and public HTTPS URL.
3. Select completed and/or no-show ticket events.
4. Save the endpoint and copy its signing secret securely.
5. Use **Send test** before accepting production traffic.
## Request security
Every request uses:
* `Authorization: Bearer `
* Optional `X-Correlation-ID` for tracing.
`POST /tickets` additionally uses:
* `X-Request-Timestamp` containing current UTC ISO-8601 time.
* A unique `X-Request-Nonce`.
* `Idempotency-Key`.
Timestamp freshness is five minutes, nonce replay records live for ten minutes, and the shared default limit is 60 requests per minute per credential.
## Configure a webhook endpoint
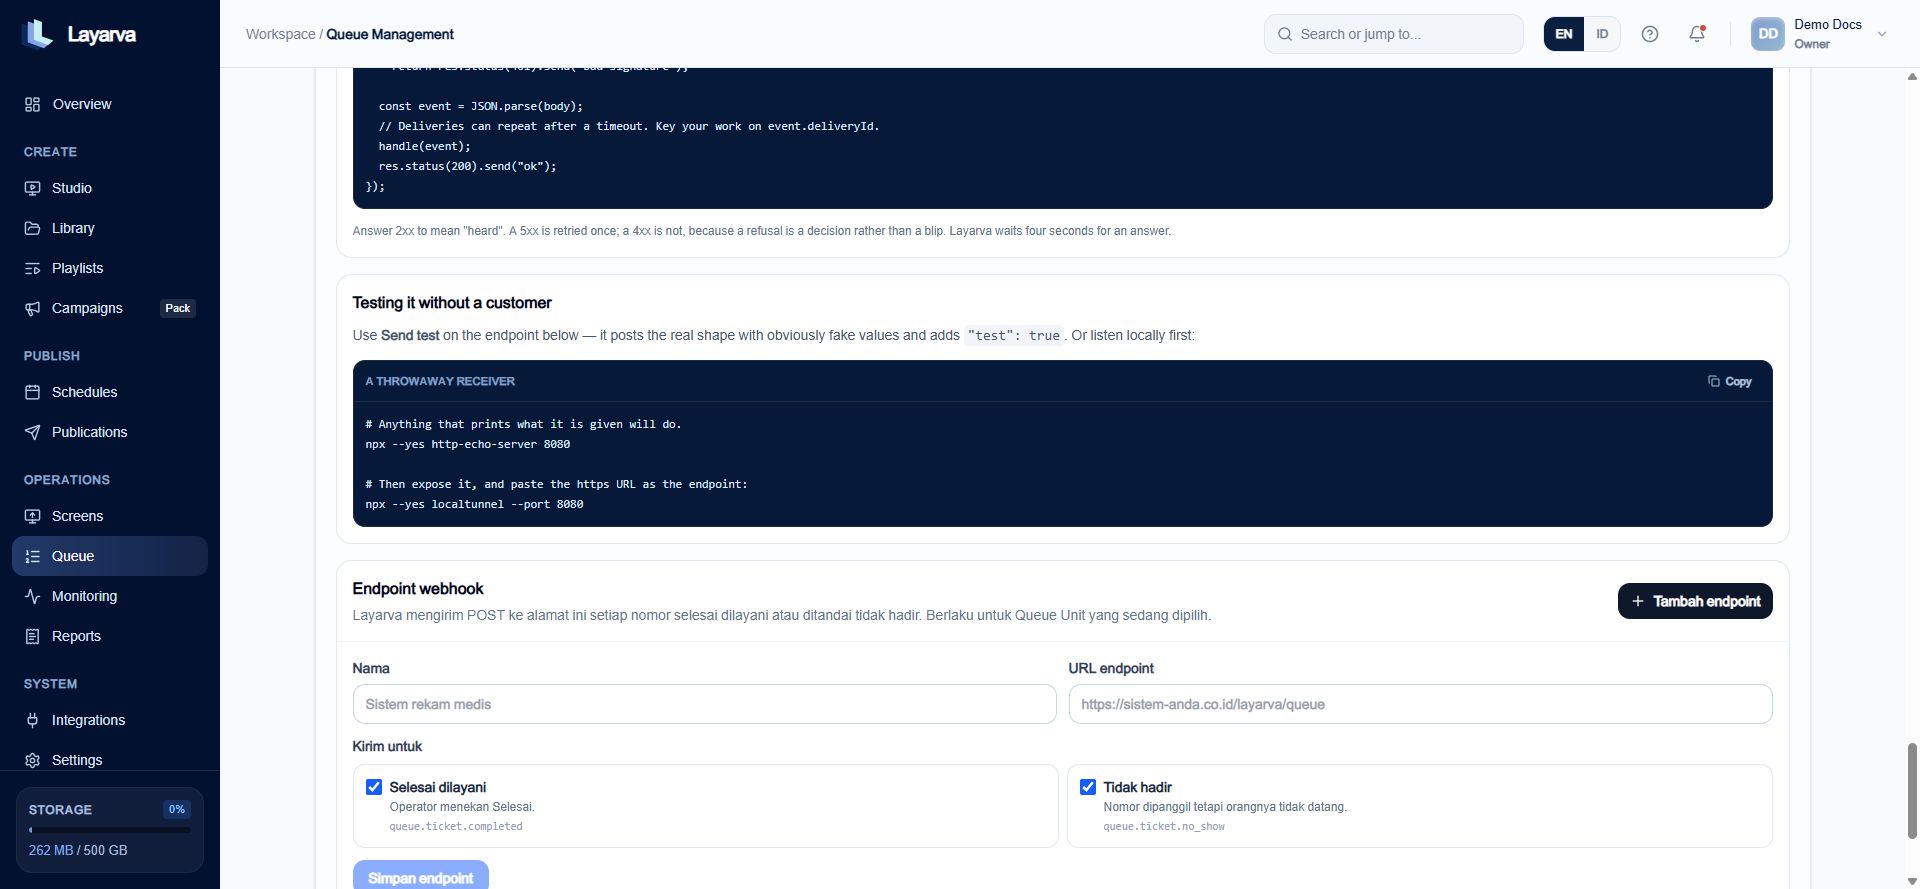
1. Select **Add endpoint**.
2. Enter a name and public HTTPS URL.
3. Select completed and/or no-show ticket events.
4. Save the endpoint and copy its signing secret securely.
5. Use **Send test** before accepting production traffic.
 Webhooks are sent by the Platform after Queue operations are applied. This preserves order after an Edge outage and avoids duplicate branch-side delivery.
## Related guides
* [Queue API Quickstart](/developers/queue-api)
* [Authenticate Queue API Requests](/developers/authentication)
* [Verify Queue Webhooks](/developers/webhooks)
Webhooks are sent by the Platform after Queue operations are applied. This preserves order after an Edge outage and avoids duplicate branch-side delivery.
## Related guides
* [Queue API Quickstart](/developers/queue-api)
* [Authenticate Queue API Requests](/developers/authentication)
* [Verify Queue Webhooks](/developers/webhooks)