> ## Documentation Index
> Fetch the complete documentation index at: https://docs.layarva.com/llms.txt
> Use this file to discover all available pages before exploring further.
# Configure a Queue Unit
> Create the Queue structure, assign operators and displays, and configure runtime behavior.
## Create the Queue Unit
1. Open **Queue**.
2. Select **Create Queue Unit**.
3. Enter a Queue name and unique Queue code.
4. Select an existing Location or create a new physical Location.
5. Create a dedicated Queue Channel or attach an available Queue Channel.
6. Save the Queue Unit.
The Queue Unit is isolated from other units. Its Categories, Counters, Displays, Kiosks, credentials, and activity cannot be mixed with another Queue Unit.
## Add Categories
1. Open the Queue Unit and select **Categories**.
2. Select **Add Category**.
3. Enter the service name, internal code, ticket prefix, and display color.
4. Save the Category.
Category codes and ticket prefixes must be unique inside the Queue Unit. Use short prefixes that are easy to read and announce.
## Add Counters
1. Select **Counters → Add Counter**.
2. Enter the customer-facing **Destination label**.
3. Enter a unique internal Counter number.
4. Select at least one service Category.
5. Save the Counter.
The destination label is shown on Displays and used in audio announcements. It is not printed on the customer's ticket.
## Assign Operators
1. Select **Operators → Assign Operator**.
2. Choose an existing workspace member or invite an Operator by email.
3. Assign one or more Counters.
4. Review the Categories served by each Counter.
Services belong to the Counter, not the individual Operator. Changing the service list changes what everyone assigned to that Counter can call.
## Add a Queue Display
1. Prepare a Queue Design, add it to its dedicated one-item Queue Playlist, and make the Queue Channel deployable.
2. Select **Displays → Add Queue Display**.
3. Select an existing Screen or choose **Pair a new Screen here**.
4. For a new Screen, choose **Cloud** and enter its six-digit code, or choose **Edge** and select the active branch Edge.
5. Select the Queue Channel.
6. Choose its audio role:
* **Audio master** plays the chime and spoken call for the Queue Unit.
* **Silent companion display** updates visually without announcing.
7. Configure language, voice, speed, chime, volume, announcement template, unlock PIN, resolution, and content fit.
8. Save the Display.
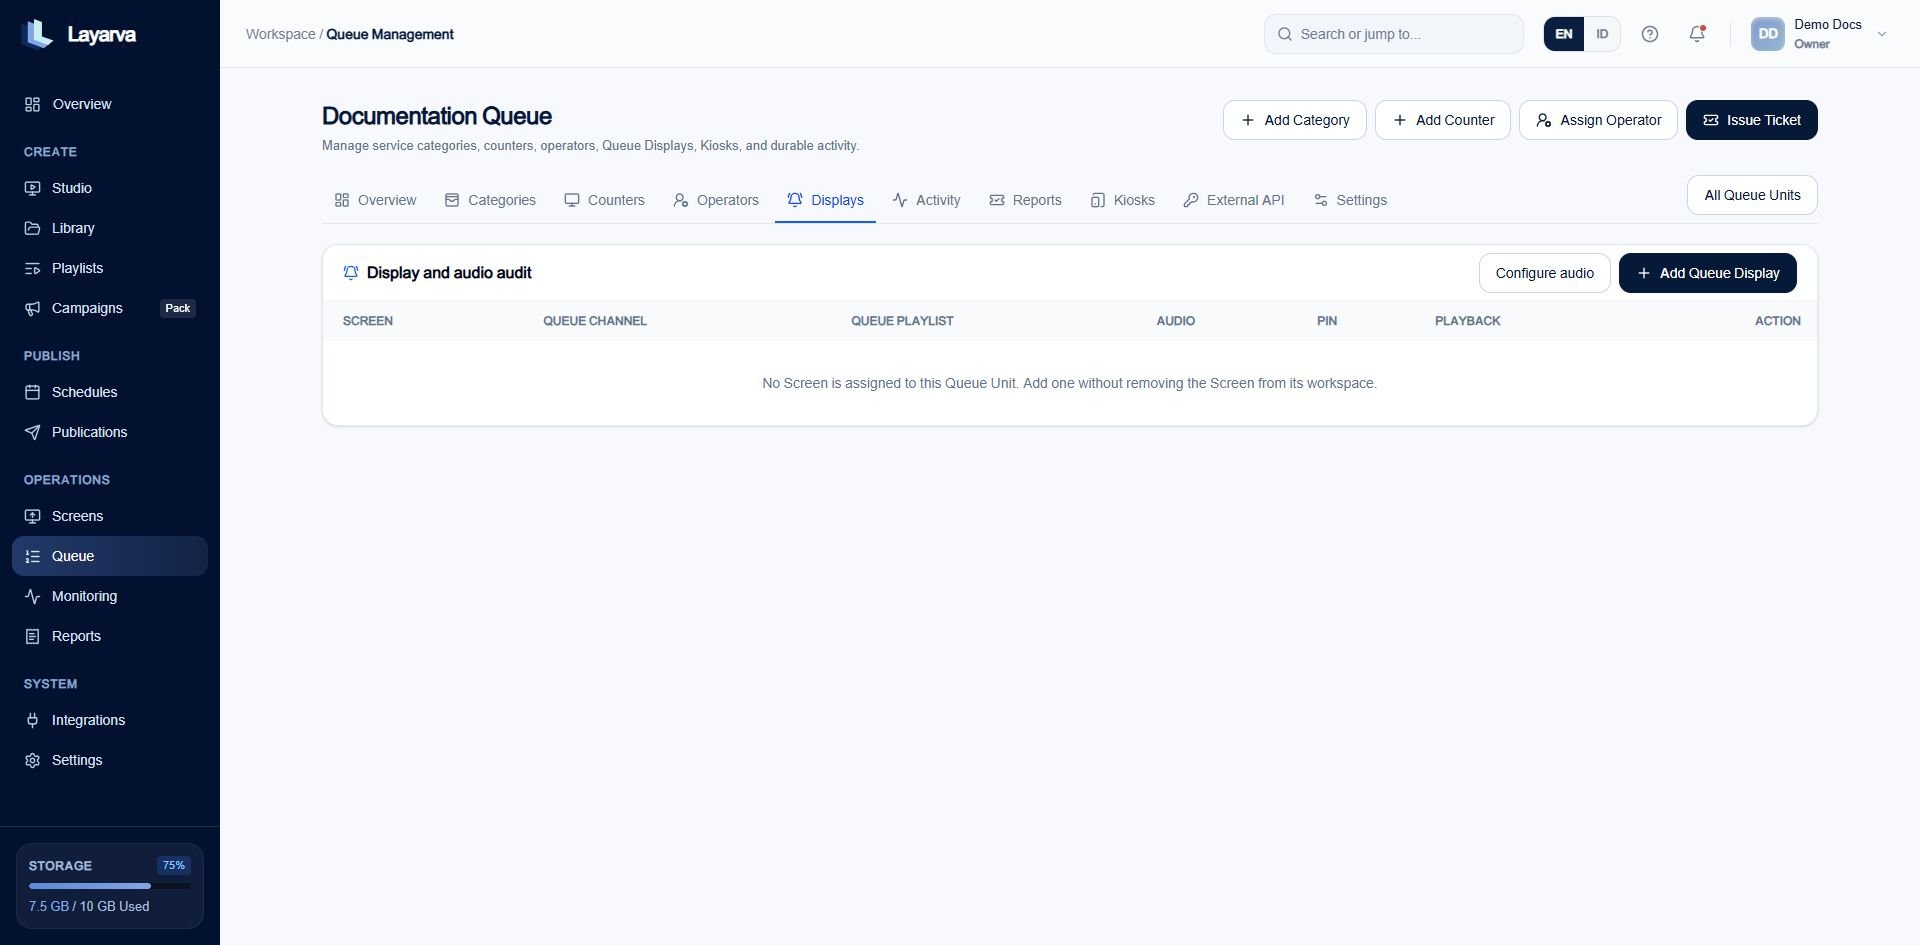 Only one Screen can be audio master for a Queue Unit. Assigning a new master makes the previous master silent. If the master goes offline and another Display is available, Layarva can promote an online Display.
## Configure operating rules
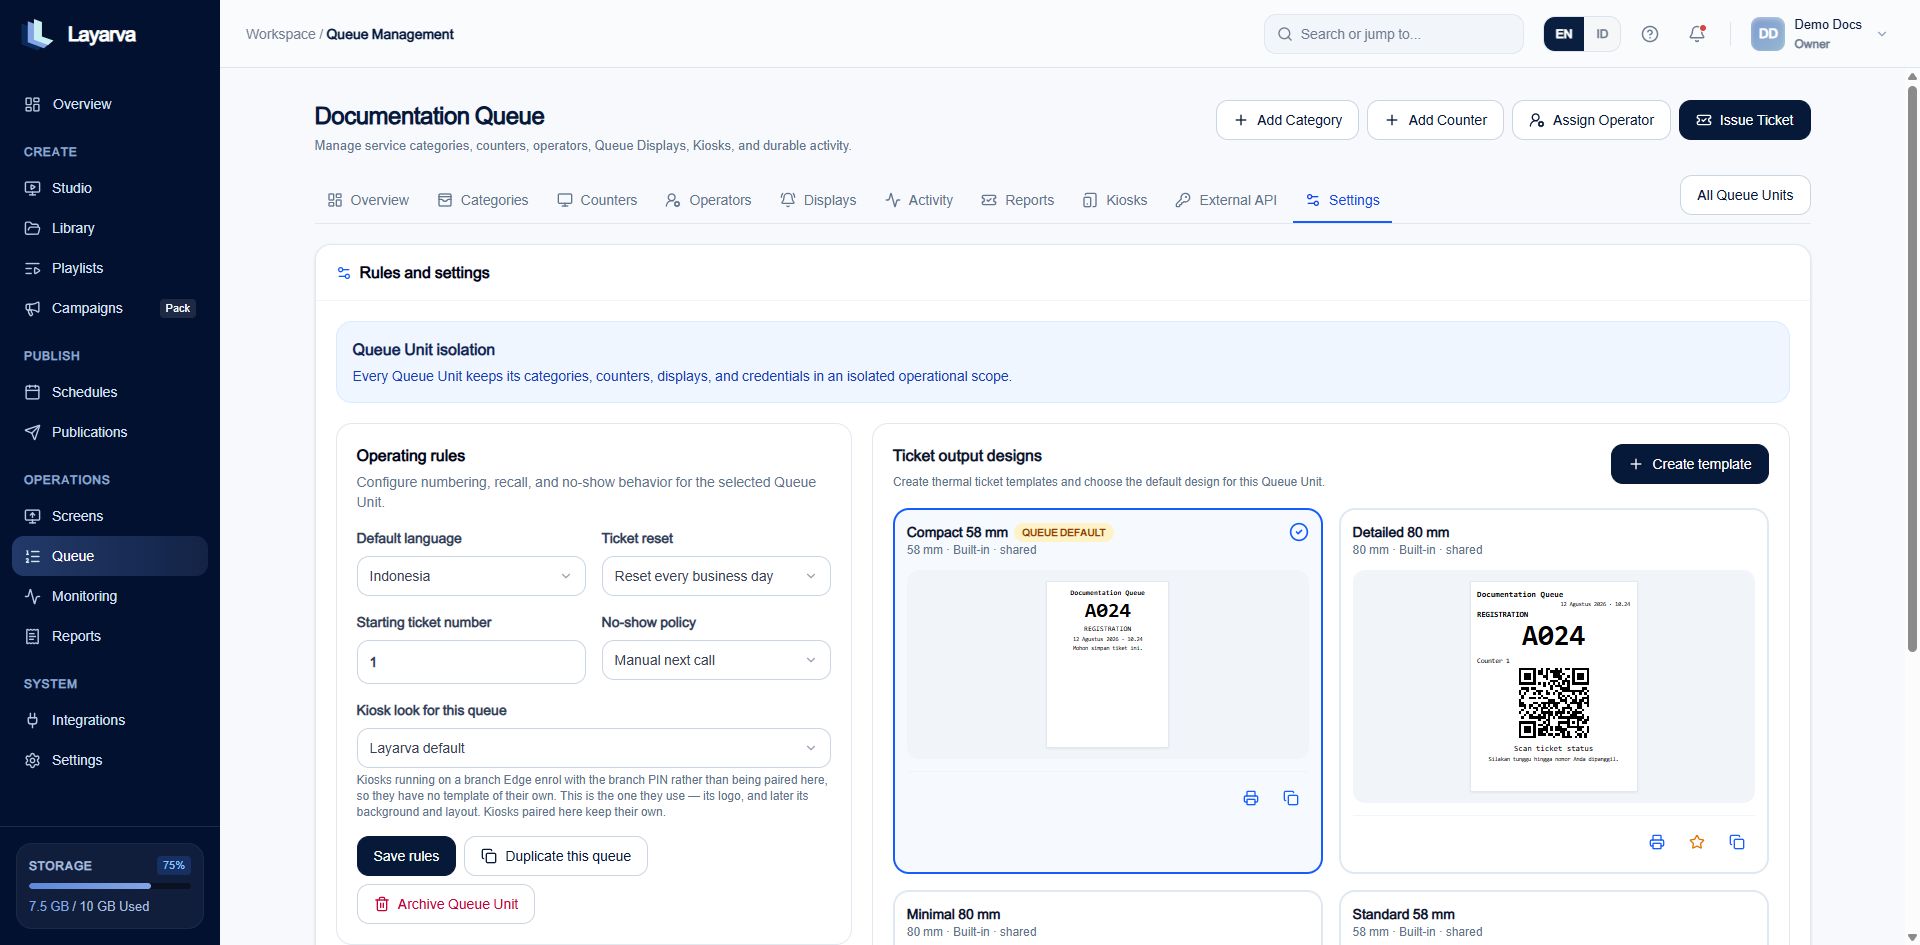
Open **Settings → Operating rules** and configure:
| Setting | Effect |
| ----------------------------- | ------------------------------------------------------------------------- |
| **Default language** | Locale used by Queue defaults and ticket formatting. |
| **Ticket reset** | Reset numbering every business day or continue the sequence. |
| **Starting ticket number** | First numeric value used by the sequence. |
| **No-show policy** | Require a manual next call or automatically call the next waiting ticket. |
| **Kiosk look for this queue** | Default Kiosk Template used by unpaired Kiosks enrolled through Edge. |
Only one Screen can be audio master for a Queue Unit. Assigning a new master makes the previous master silent. If the master goes offline and another Display is available, Layarva can promote an online Display.
## Configure operating rules
Open **Settings → Operating rules** and configure:
| Setting | Effect |
| ----------------------------- | ------------------------------------------------------------------------- |
| **Default language** | Locale used by Queue defaults and ticket formatting. |
| **Ticket reset** | Reset numbering every business day or continue the sequence. |
| **Starting ticket number** | First numeric value used by the sequence. |
| **No-show policy** | Require a manual next call or automatically call the next waiting ticket. |
| **Kiosk look for this queue** | Default Kiosk Template used by unpaired Kiosks enrolled through Edge. |
 ## Verify the operation
1. Select **Issue Ticket** and create a test ticket for one Category.
2. Open the Operator Console and call it from a compatible Counter.
3. Confirm the number and Counter label appear on every Queue Display.
4. Confirm only the audio master announces it.
5. Complete or mark the ticket no-show.
6. Verify the event under **Activity** and **Reports**.
## Related guides
* [Queue Management Overview](/queue/overview)
* [Design and Print Queue Tickets](/queue/ticket-printing)
## Verify the operation
1. Select **Issue Ticket** and create a test ticket for one Category.
2. Open the Operator Console and call it from a compatible Counter.
3. Confirm the number and Counter label appear on every Queue Display.
4. Confirm only the audio master announces it.
5. Complete or mark the ticket no-show.
6. Verify the event under **Activity** and **Reports**.
## Related guides
* [Queue Management Overview](/queue/overview)
* [Design and Print Queue Tickets](/queue/ticket-printing)